Programming Weather Alarms
Using the Professional Weather Center: Programming Weather Alarms
Before you begin
Place the display unit in a dry area free of dirt and dust.
To ensure accurate temperature measurement, place out of direct sunlight and away from heat sources or vents.
Display unit stands upright for tabletop use or is wall-mountable.
- Learning Mode is off.
- The Self-Calibrating Forecasting uses a unique algorithm to analyze changes in pressure over a time period (called Learning Mode ) to determine your altitude.
- Minimum 1 person
- Technician, electrician, engineer.
- High school
- 30 minutes
-
Professional Weather Center model 01036 / 351543
- Instruction Manual for model 01036 / 351543
- Power Adapter
- 6 batteries AA
- USB Cable for PC Connection
- 3 batteries AA
Maximum allowed wind force is 6 Beaufort when working in the tower. (measured 10 meters above ground)DANGER 
- Gale wind force must be lower than 70 km/ hour.
About this task
Procedure
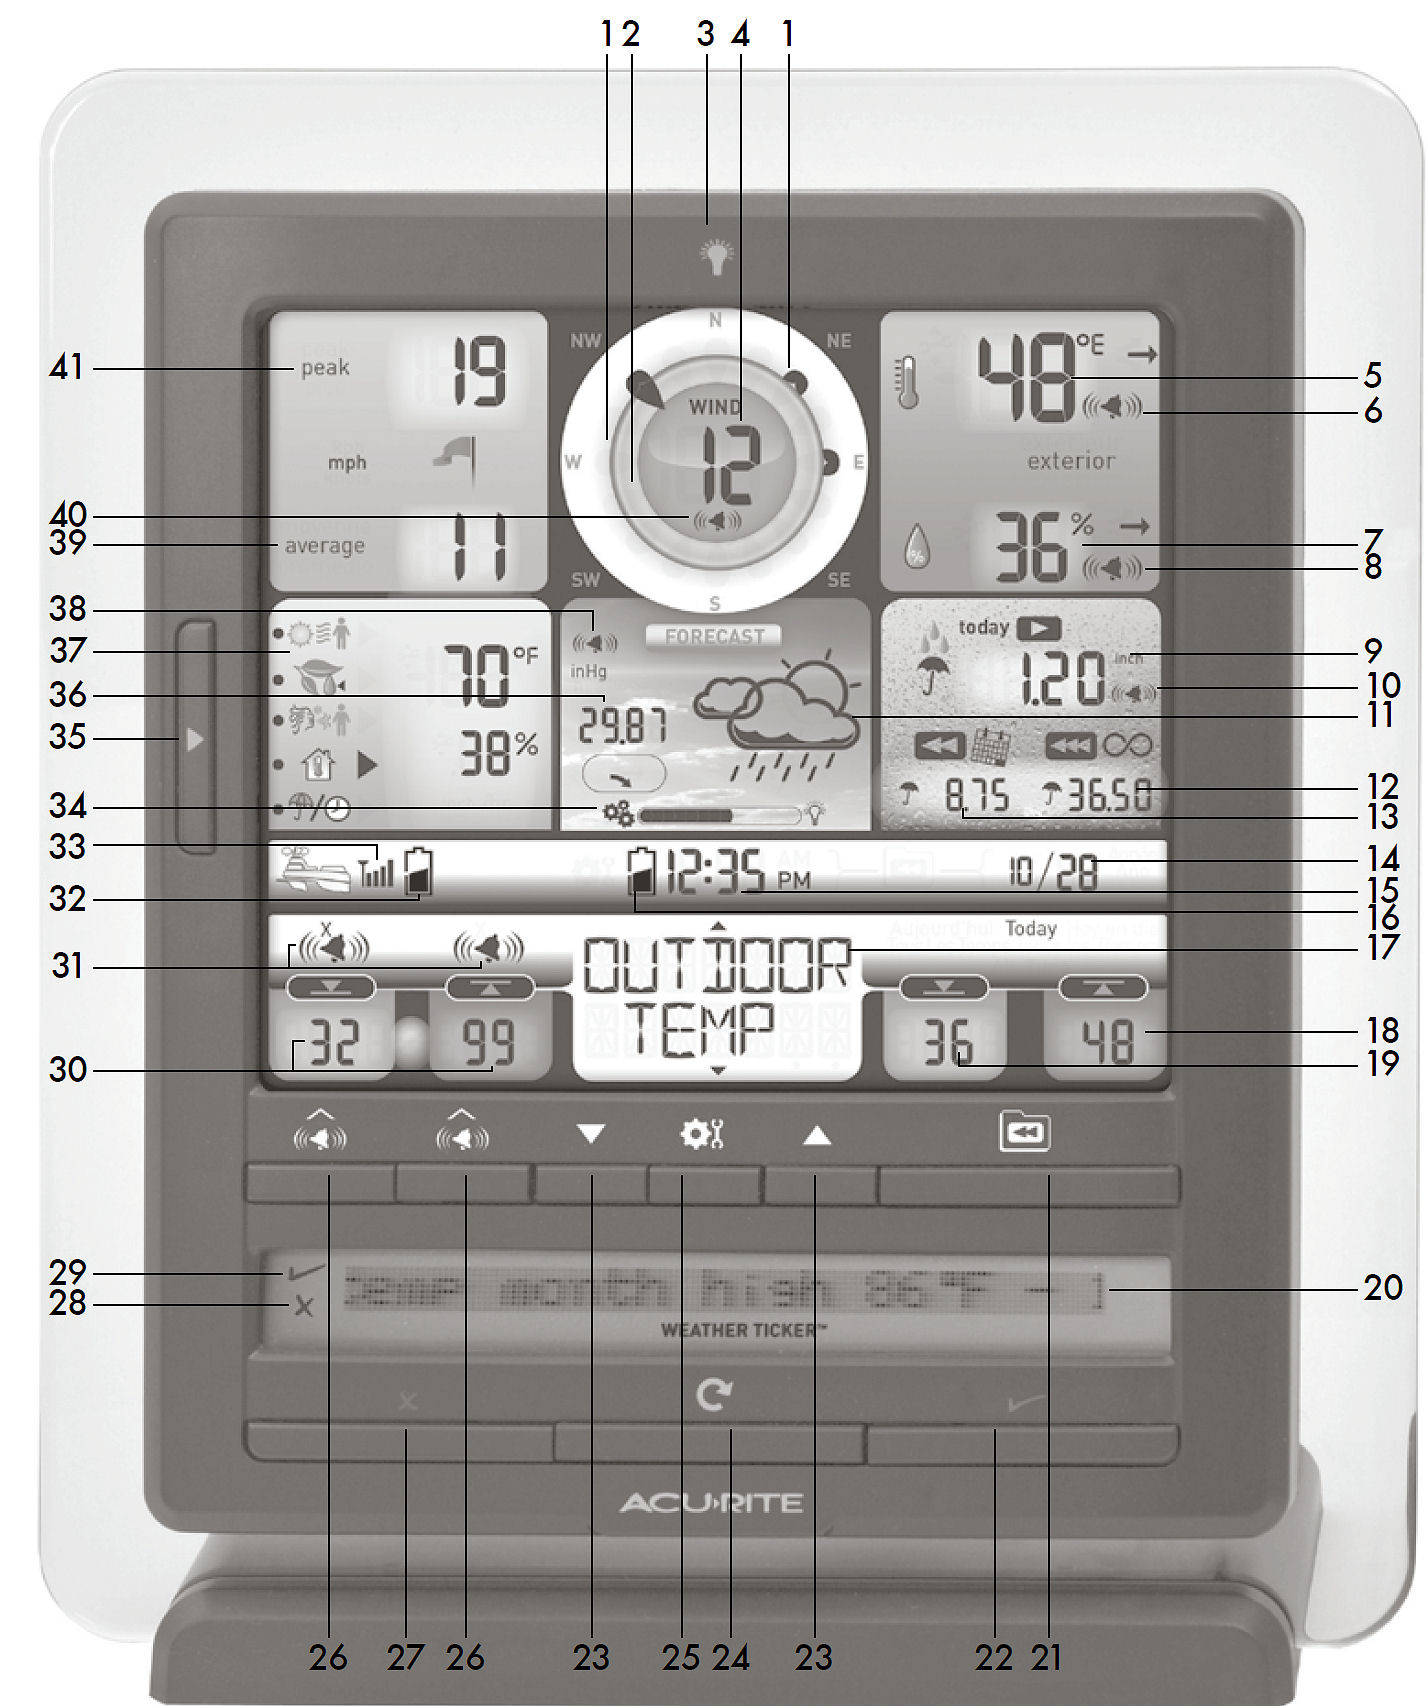
Programming Weather
Alarms.
-
To program a value (only applies to alarms that require a value),
press AND HOLD the “
 ” button underneath the alarm you wish to set until the
“
” button underneath the alarm you wish to set until the
“ ” indicator appears and the alarm setting
flashes.
” indicator appears and the alarm setting
flashes. -
Press the “
”button to confirm a value.
-
Next, press the “
”button to activate the alarm
Silencing a Sounding
Alarm
Setting up Display Unit & 5-in-1 Sensor
Setup of Display Unit & 5-in-1 Sensor can be done beforehand.
About this task
Procedure
5-in-1 Sensor Setup
Display Unit
Setup